Descriptions in this documentation may differ from or not be available in the Quick.Cms documentation. If you're using Quick.Cms.Ext v6.x, log in » to gain access to extended descriptions. Close the message »
This documentation was written for Quick.Cms.Ext! Descriptions in this documentation may differ from or not be available in the Quick.Cms documentation. Access to some sections is granted only to Quick.Cms.Ext v6.x users.
Quick.Cms.Ext v6.8: detailed information
Welcome, Quick.Cms.Ext user. In this section we described all options in our system, we divided them into parts. If this is your first contact with our program, start with first steps » instructions.
System configuration
To change your login data, assign pages to certain options, or other functions, use settings. Point to the icon in the top right corner of the administration panel and choose the Settings option.
You should see a form containing the following fields:
From the list choose a page, that a person visiting your website will see first. Of course it's logical that before setting this or other pages, you first have to create them, but you already know how to do that, you've read that in the first steps » instructions.
Search results page
From the list choose a page, on which search results will be listed. If you want to disable the search box, choose none. Option available after installing the pagesSearch
Page with site map
From the list choose a page, on which the map of your website will be shown. On the page you select, the software will automatically display all pages except for news type subpages, for example. You can disable the site map by selecting none, it's recommended for websites with a large amount of pages and subpages. Option available after installing the sitemap
Contact page Option available after installing the contactForm plugin
Contact form will be assigned to this page.
404 error page Option available after installing the seoOptions plugin
When a page that is being called does not exist, a user will be redirected to the page set in this field.
Tags page Option available after installing the tags plugin
Pages with a selected tag assigned to them will be listed on this page.
Page with events This option is available after installing the newsExt plugin.
Pages with events from a given date will be displayed on this page.
Registration page The option is available when the users plugin is installed.
The link: user registration will redirect to this page.
Profile page The option is available when the users plugin is installed.
The link: user profile will redirect to this page.
Page with register terms The option available after installing the users plugin.
Page with registration terms or privacy policy. If this page is assigned, when a customer is registering (if you make registration available) they will have to accept the terms
Page after logging in The option available after installing the users plugin.
The page to which a user will be redirected right after logging in.
Enter your new valid email address if you want to change the login data. You don't have to fill this field in, if all you want to change is the password.
New password
Enter a new password you are going to use to log in to the administration panel. We recommend changing the password from time to time.
After entering the new email or password two additional fields will be displayed:
Current email and Current password
To set a new email or a new password or both, you need to enter current email and password to confirm, that it's you and not somebody else trying to change the data.
Try not to store your password on your computer. Don't use More » the remember password and email address option in your browser. This significantly diminishes your website's security. If you have to write the login data somewhere, use a piece of paper and put it away with your documents. Contrary to the popular belief it's a safer way than keeping it on your computer.
Remember, that after making any changes in the form, you need to save it using the SAVE button at the top or bottom of the form.
List of pages
To go to the list of pages click Pages on the top menu bar under the OpenSolution logo (on the left).
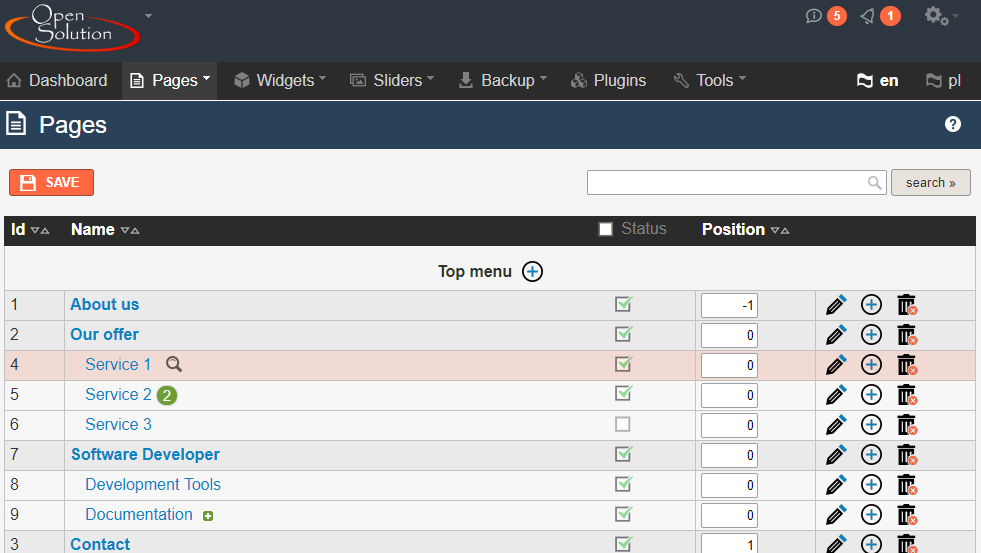
It may not seem like it, but there's a lot you can do on that list including managing pages and subpages. The list might look like this:
Components of the list
Pages are grouped according to menu types, to which they are assigned, the list is also grouped into columns:
Id - page id
Name - page name. Click on a chosen page name to edit the page.
Status - if this option is checked, the page will be visible client-side
Comments - checking this option allows your customers to write comments on selected page. Option available when the comments plugin is installed
Position - determines order in which pages are displayed with respect to other pages. The pages are ordered from the smallest to the greatest value. Negative values are allowed
Options (column not labeled) - includes icons redirecting to page edit form , adding new subpage or deleting it . After installing the clonePages plugin, an additional cloning icon appears in the list.
Modifying pages on the list
You can manage pages by changing their status (display) or position respective to other pages. Remember, that after changing these data you need to save them by clicking the orange save button on top or bottom of the list.
Additional information
Sorting pages - click one of the fields on top of the list: Id, Name or Position to sort the list by the chosen field.
Search box - above the list there is a search box, that will help you find pages easier
Quick preview - point your mouse over a page name on the list, you will see the icon, clicking it will redirect you to the page client-side
View pages on a separate list - if the icon is found next to the page name it means, that its subpages are available on a separate list. Click the icon to go to the list of subpages of selected parent page.
Additional information - if the icon with a number is next to the name of the page, when you hover your mouse over it, you'll see helpful information, e.g. redirecting the selected page to another address, instructions to robots, etc.
Quick addition to the menu - you'll see the icon next to the menu name. Clicking on it will take you to the new page form with automatic selection that it will be assigned to the menu you choose
Quick addition to the parent page - after clicking on the icon for the selected parent page, you will go to the form of the new subpage, which will have the parent page already set.
Page form
To go the a page edit form you need to click the page name or the icon.
You should see a form containing the following fields:
It's the name of the page you're editing, it will be displayed in a menu or in a list or subpages as well as the page title. You can More »change the page name displayed in a menu if, for example, it's too long. In the Advanced tab set the Name in a menu.
Short description
It's the text that will be displayed on the list of subpages.
Full description
It's the page content. The built in editor allows you to add many elements such as lists, images, links, galleries, widgets, etc.
To add a chosen gallery or a widget (custom type) to the page content, click the or icon, then from the list select the element you want to add. If there's too much content on a page and you want to use text Pagination, click the icon to divide the content into several pages.
Field determining if a page is active - visible or not visible to users browsing your website. The Status field can also be used by an administrator to see the final result of changes he or she was making before letting it be seen by visitors. To do that More »log in to the administration panel, uncheck the page status. Viewing your website client-side you will notice, that the page you are editing and which status is not active is still visible (just to you). If this functionality doesn't work, contact your webmaster to configure this option
Parent page
You can assign the page you are adding/editing to another page, the page you're adding/editing will be displayed on the list of subpages of that another page. If you don't want your page to be a subpage, choose the option none, and then set a menu in which it will be displayed.
Position
Determines position of the page in a menu, list of subpages, etc. Pages with lesser position are displayed before pages with higher position. Negative values are allowed to help you manage this field when a website has many pages.
Menu
Determines which menu the edited page will be assigned to. This field will be hidden if a page is selected from the list of parent pages.
Subpages
From the list choose the way subpages assigned to this page will be displayed.
List - simple list of subpages (in rows)
News - subpages of a given page will be displayed as news including name, date (if given), short description and image. The news will be sorted by date oldest to latest and will not be included in the Site map.
Gallery - subpages will be displayed as an image gallery in three columns.
Slider - subpages will be displayed in a slider.
No display - subpages won't be displayed on any page
When you check this option, you will enable adding comments on the page. Option available after installing the comments plugin
Link - got a question? Option available when the askFormLink plugin is installed
The field is responsible for displaying the "Got a question?" link redirecting to the contact form.
Slider
From the list of sliders select the one you want to be displayed as a main slider. You can also disable displaying of the slider on the edited page after selecting the option none. Otherwise the slider set as default will be displayed.
Name in a menu
Enter an alternative name that will be displayed in a menu. Usually this function is used when the page name in the Name field is too long.
Keywords Option available after installing the pagesSearch
Field used by the script's search tool. Enter here all phrases not included in the name, short and full description as well as in SEO fields.
List of files in a table Option available after installing the downloadExt plugin
All files on this page will be displayed in a table with additional information and sorting ability.
Drop down menu Option available after installing the dropDownMenu plugin
If the page has subpages, when this option is checked they will be displayed in a drop-down menu after pointing to the page.
Inactive link in the menu Option available after installing the dropDownMenu plugin
Option to disable link (on client side) for the edited page. The solution is used for parent pages which function is to direct to subpages. Turning off linking in the menu will mean that when you hover your mouse over the parent page, e.g. Offer, you will have to choose one of the subpages, because clicking on the parent page will not be possible.
User group Option available after installing the users plugin.
When a full address is entered in this field, a person visiting the page will be redirected to that address. You can redirect to external websites or to pages on your website.
or choose redirection to page:
This option is displayed after clicking the Show button next to the drop down list Redirect to URL. Using this function is recommended when you want the page you're editing to redirect to another page within your website.
Page title
Name, that will be displayed in the top bar of your browser, as well as page title used by Google search engine.
Url name
Name to be displayed in the address field of the internet browser. Use this field when there are two pages with the same title on the website. This address is also used by Google search engine.
Meta description
This field contains short description of a website visible only to browsers and used only by them. If this field is empty, the script will generate the description, but if there's the need, the meta description may be set manually.
Instructions for web robots
From the list select the position you want to use. You can, for example, make the website your editing not to be indexed by Google.
Tags This field is available after installing the tags plugin (since version 6.5, previously in a separate Tags tab)
Select tags to which the page is linked and which will be displayed client-side under page's full description. After selecting a tag, all pages with the tag will be displayed. Click on the "New tag" link to display a new tag form in a new browser window. Fill it following the instruction » and save the tag. Then close the tag window, save the page and you should see the newly added tag.
Page ID in the link
Check this field if you want the edited page ID to be included in the link.
Hide in a sitemap Option available after installing the sitemap
After selecting this option, edited page will not be shown on a sitemap (if you're using it on your website), neither on the XML site map (http://your-domain.com/sitemap.xml)
Hide in search results Option available after installing the pagesSearch
After choosing this option, the page you are editing will not be included in search results when using a search tool on your website (if you use it). Choose this option for purely "functional" pages, such as register or order form.
This tab allows to upload new files to a server, it also shows a list of files already available on the server which can be added to the website
Adding files from a computer
To add files, click the Select files from computer to upload button, then select files you want to put on the edited page. After uploading them, save the page (click the save button), so that the selected files are attached to the page. If you want to add more than one file, hold the Ctrl key and select other files.
Select files from server
If there are too many files, not all of them will be displayed. You will see however a Show all files buttons, which you have to click on More »to see all files on the server. If you know the name of the file, use the search box in the File column.
The list of files is organized in columns (all of which will be displayed when a file is selected):
Select - check images you want to add to the page
File - file name
Position - order in which the files will be displayed if there are many. Negative values are allowed
Description - displayed under the file and in the ALT attribute, if the "Alternative description" field is empty. More »In case of images, if the $config['link_images_to_url_from_description'] » variable is enabled, you can enter in this field an URL address starting with "http", for example http://www.google.com. When a visitor clicks on a thumbnail in page details, he or she will be redirected to www.google.com. It's useful, when a thumbnail is, for example, a manufacturer's logo, which is supposed to redirect to their website. Remember, that if you want to show the URL address in the image description but you don't want it to redirect to the website, remove the "http://" from that address. For example, replace "http://www.google.com" with "www.google.com".
Alternate description - for images only - separate description for the ALT attribute, very important for web search engines.
Location: page details - for images only - location in which the image will be displayed in page details.
Thumbnail - for images only - size of the larger thumbnail dimension (there are 3 thumbnail sizes to choose from, as described below) and cropping proportions:
Page details - size of a thumbnail that will be used in page details. On the right, next to the image size field, you can also set the full size image option. Unchecking this option will block the possibility to click on the thumbnail in page details to see the full size image. This solution is useful when thumbnails displayed in page details are large and there's no need to present bigger versions.
List of subpages - size of a thumbnail displayed on the list of subpages, when a parent page is assigned to the page. First check the field, you will see a select of various thumbnail sizes, as well as an "x" button, click on it to cancel this option.
Widgets, etc. - size of a thumbnail displayed in locations other than already mentioned, for example in widgets. First check the , then you will see a select of various thumbnail sizes, as well as an "x" button, click on it to cancel this option.
Cropping - for images only - list of possible ratios to which a thumbnail can be cropped and added to a page
This tab displays files attached to the page that is being edited/created and allows to delete them.
List of files is organized in columns:
Delete - check files you want to remove from the page
File - file name
Position - order in which files will be listed if there are many. Negative values are allowed.
Description - displayed under the file and in the ALT attribute, if the "Alternative description" field is empty. More »For images, if the $config['link_images_to_url_from_description'] » variable is enabled, you can enter in this field an URL address starting with "http" for example http://www.google.com. Then when a visitor clicks on a thumbnail in page details, he or she will be redirected to www.google.com. It's useful, when a thumbnail is, for example, a manufacturer's logo, which is supposed to redirect to their website. Remember, that if you want to show the URL address in the image description but you don't want it to redirect to the website, remove the "http://" from that address. For example, replace "http://www.google.com" with "www.google.com".
Alternate description - for images only - description for the ALT attribute, very important for web search engines.
Location: page details - for images only - location in which the image will be displayed in page details.
Thumbnail - for images only - size of the larger side of a thumbnail (there are 3 thumbnail sizes to choose from, as described below) and cropping proportions:
Page details - size of a thumbnail that will be used in page details. On the right, next to the image size field, you can also set the full size image option. Unchecking this option will block the possibility to click on the thumbnail in page details to see the full size image. This solution is useful when thumbnails displayed in page details are large and there's no need to present bigger versions.
List of subpages - size of a thumbnail displayed on the list of subpages, when a parent page is assigned to the page. First check the field, you will see a select of various thumbnail sizes, as well as an "x" button, click on it to cancel this option.
Widgets, etc. - size of a thumbnail displayed in locations other than already mentioned, for example in widgets. First check the , then you will see a select of various thumbnail sizes, as well as an "x" button, click on it to cancel this option.
Cropping - for images only - list of possible ratios to which a thumbnail can be cropped and added to a page
When a date is entered in a specific format, and the page is a subpage, value of this field will be displayed. Depending on script's settings, you can use one of two date formats: More »
first one is using the built into a browser calendar. It is easy to use and a protects from entering the wrong date format.
second is less visually friendly, but allows for more and is well known from previous versions, the date is given together with hour and minute.
Redirect to URL
When a full address is entered in this field, a person visiting the page will be redirected to that address. You can redirect to external websites or to pages on your website.
or choose redirection to page:
This option is displayed after clicking the Show button next to the drop down list Redirect to URL. Using this function is recommended when you want the page you're editing to redirect to another page within your website.
Event from Option available after installing the newsExt plugin.
Date from which the event will be displayed in the calendar if the "Event from" date is set, or just the specific date when the event will show in the calendar. Depending on the script's settings, two date formats can be used More »
first is the browser built in date handling with a calendar. It helps to handle the date and protects against typing in an invalid date.
the second one is less visually friendly, but leaves you more possibilities and is familiar from previous versions, the date must be given with hour and minute.
Event to Option available after installing the newsExt plugin.
Date to which the event will be displayed in the calendar if the "Event to" date is set, or just the specific date when the event will show in the calendar. Depending on settings, the script allows for using two date formats More »
first is the browser built in date handling with a calendar. It helps to handle the date and protects against typing in an invalid date.
the second one is less visually friendly, but leaves you more possibilities and is familiar from previous versions, the date must be given with hour and minute.
Subpages in the calendar Option available after installing the newsExt plugin.
If this option is selected, subpages of second level will be displayed in a widget with selected calendar option.
Display date and author of the modification Option available when the pagesLogs plugin is installed
Checking this option causes displaying client-side date and name of the administrator who made the last modification of the page.
Available from Option available when the publicationDate plugin is installed
A date that informs the system from when the edited page should be visible to visitors to your site. For example, if you want to inform about a temporary promotion, you can set the start date of publication of the message on the site.
Available to Option available when the publicationDate plugin is installed
A date that informs the system until when the edited page is to be visible to visitors on your site. For example, if you want to inform about a temporary promotion, you can set the final date of its publication on the site.
Choose the template that will be displayed after entering the page you're editing.
Subpages in the panel on a separate list
Choosing this option will hide the list of subpages of the edited parent page on the main list of pages in the administration panel. On the list next to the parent page there will be a "+" icon, redirecting to the list of subpages of selected parent page.
Additional parameters
This form element can be unavailable to you when a developer mode is enabled and the $config['disable_additional_params_editing'] variable is set to true. Options available here require advanced knowledge. Modifications of entered values can cause the page to display incorrectly in its menu. Use these options carefully. In the Graphics design - advanced information » section we have described in detail how to use additional parameters.
This tab is available after installing the pagesFeatures plugin
In this tab you can enter features, for example product's technical specifications.
If you're using the advanced search tool (advancedSearch plugin) with feature search, enter values in to the same format. For example, if you type in weight 10 kg, always use the same format: 10 kg. There are other formats, such as: 10kg, 10 kilograms, 10.00 kg, 10 000 grams, etc. This makes it necessary to standardize feature descriptions which will be displayed in the search box.
When adding a feature (menu Pages -> New feature), it's possible to define possible values, which you can later choose here when editing a page.
After clicking the "New feature" option you will see two fields. In the first of those two enter the feature's name, such as weight, in the other the feature's value (technical specifications), for example 10 kg.
This tab is available after installing the relatedPages plugin
This tab allows to select linked pages, which will be displayed client-side under page's full description.
Related pages
Select pages to be related to the given page. You can select multiple pages by clicking them while holding down the CTRL key.
List as slider
After selecting this option, the list of related pages will be displayed as a slider instead of a classic list.
Find related
After clicking on it, you will be redirected to the list to see which pages are linked to edited page.
After changing any data in the save, remember to save the data using the SAVE button on top or bottom of the form.
Additional save options:
save and go to the list - this save option will save the changes you made on the the page you're editing and redirect you to the list of pages displaying all pages on the website. There is a configuration option, that allows you to go to the recently viewed list. More »It's especially useful if you're often using the search tool or you have a separate list with news ($config['display_news_in_admin_pages_lists'] » variable is responsible for this function). Learn more about recalling the recently used list in the description of the $config['redirect_to_last_used_list'] » variable
save and add another - this save option will save the changes you made on the the page you're editing and redirect you to an empty form so you can create a new page
save and clone - this save option will save changes on the edited page and will create another one with identical content Option available after installing the clonePages plugin.
Import and update of a CSV file
Point to the "Pages" tab and select the Export to CSV link. Save the downloaded file on a disc and open it in any editor such as Notebook.
Note! This functionality is only available with the exportImportPages plugin which needs to be installed. If you don't see this position on the menu, the plugin probably hasn't been installed.
The functionality allows to export pages to a clear CSV format, and later to import (update) them to the database. Each page is recorded in a separate line, fields of which are separated by the "$" separator. Descriptions of all data are displayed in the first line of a file.
Page data can me modified. Remember to keep proper data format (for example position must have a numeric value), as well as order of columns, and to use the "$" character only as data (fields) separator.
Selected fields are described below:
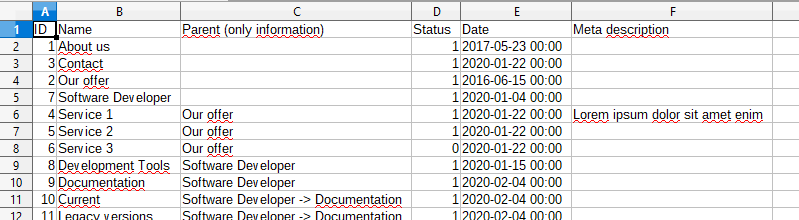
Id - id of a page to be updated (replaced). This field is only for information it cannot be modified.
Parent (only for information) - hint in which parent page the selected subpage is located. Modifying data in this field has no effect on the data updated in the database. The data presented in this field is for information purposes only.
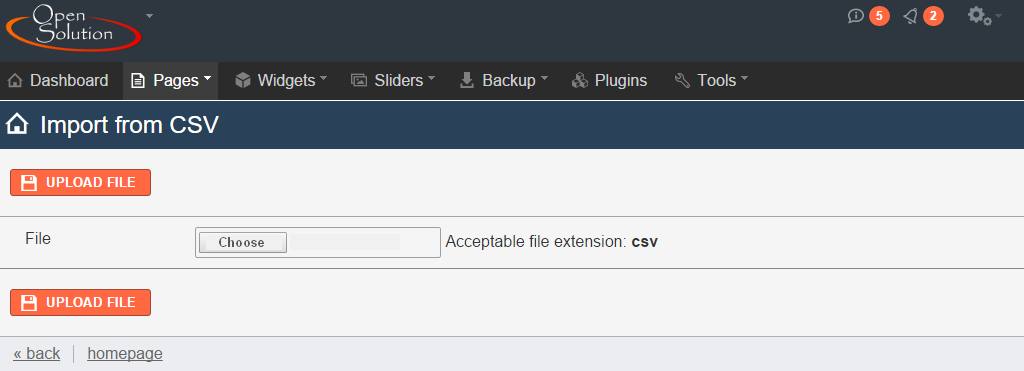
Update from CSV link redirects to a form allowing to add a CSV file. The form includes the fields:
File - select a file from the disc with modified page data.
Note!
Before importing pages we recommend backing up the database as described in the list of backups » section.
Each operation should be finished with saving the data by, for example, the "upload file" button on top or bottom of the form.
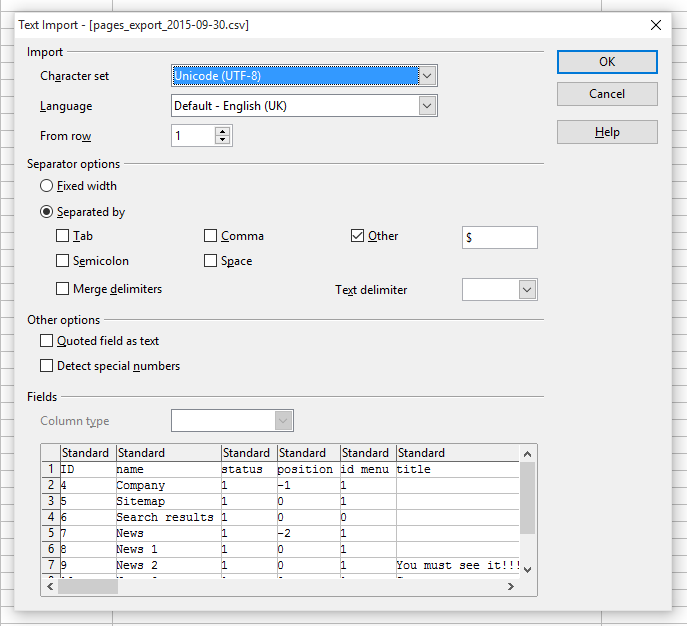
Importing data to OpenOffice.org Calc
After starting the OpenOffice.org Calc program select "File" in the top menu and then "Open". Select a file from disc with the CSV exported data.
Then set the options to be the same as in the following example:
Correctly imported data should look as in the following example:
When the changes are made, you can save the data selecting "File" and then "Save" from the menu. You will see a message asking about the format the data should be saved in. Choose the CSV format.
Warning! Deleting all data of the selected page from the spreadsheet will not delete the data in the system database. For better organization of the changed data, you can delete entire rows with the data of selected subpages that are not to be modified. Leaving only the data of the modified subpages you will know which subpages have changed from the CSV update.
Features
To go to the list of features point to the Pages button on the top menu bar of the administration panel, under the OpenSolution logo (on the left), and then click the Features link.
Note! This functionality is only available with the pagesFeatures plugin, which requires installation. If you don't see this position on the menu, the plugin probably hasn't been installed.
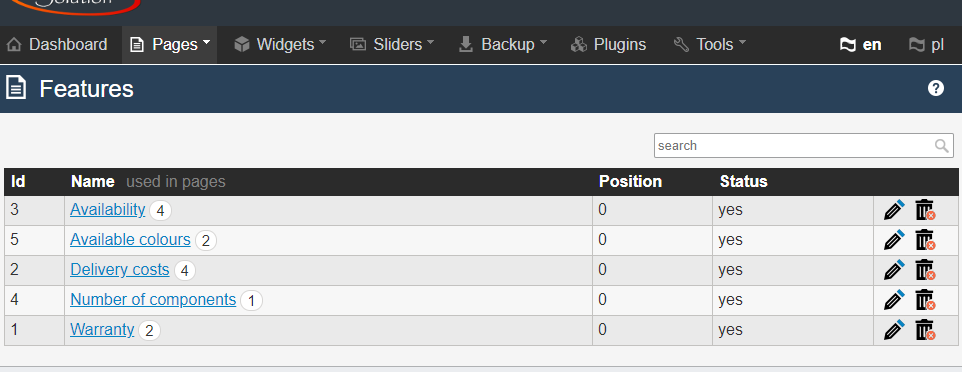
From the list you can learn more about features on your page. The list could look like the following:
Components of the list
Id - feature's id
Name - feature's name
Position - determines order in which features are displayed with respect to other features. Features are listed from the smallest to the greatest value. Negative values are allowed
Status - information about feature's visibility, if "yes" it will be visible to customers
used in pages - the number of all pages using a given feature. Hovering over the digit will display a list of subpages that use the selected feature. When there are more subpages, you can search for all of them by clicking on the "Search assigned pages" link.
Options (column not labeled) - includes icons redirecting to features edit form or deleting it
New feature
To add a new feature to a page point to the Pages tab and then click the New feature button.
You should see the form including the following fields:
Components of the form
Name - feature's name
Position - determines order in which features are displayed with respect to other features. Features are listed from the smallest to the greatest value. Negative values are allowed
Status - information about feature's visibility, if "yes" it will be visible to customers
Select option - marking it allows you to define a list of values available for selection in page form. Click the "New value" button to add new elements to the list.
Click on the Search assigned pages link available in page form, then you will be redirected to the list of pages that use the edited feature in their description.
After making changes to the form's content remember to save the data using the SAVE button, located on top and bottom of the form.
List of widgets
To go to the list of widgets click Widgets on the top menu bar in the administration panel under the OpenSolution logo (on the left).
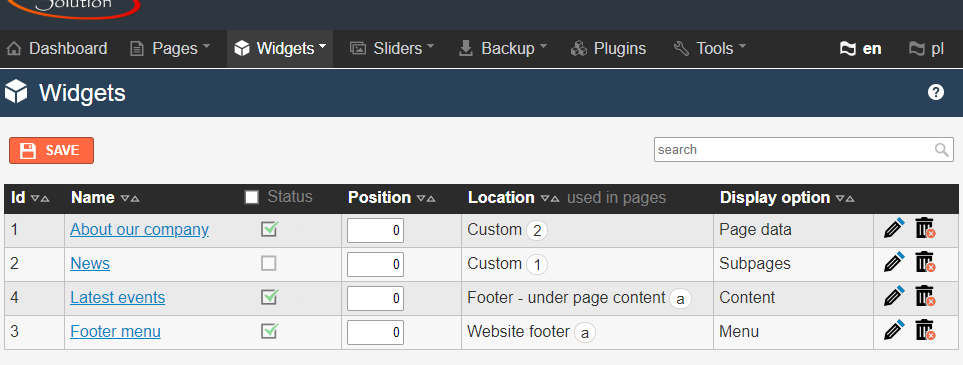
On the list of widgets you can do many operations including managing widgets. The list could look like this:
Components of the widget list
The list is divided into columns:
Id - widget id
Name - widget name. Click the chosen widget's name to edit the widget.
Status - if this option is checked, the widget will be visible client-side
Position - determines order in which widgets are displayed with respect to other widgets. The widgets are listed from the smallest to the greatest value. Negative values are allowed
Location (used in pages) - specifies where a given widget is to be displayed. Digits displayed in the circle inform about the number of subpages, in which they are displayed. Hovering the mouse over the digit will display a list of subpages to which the widget is assigned. When there are more subpages, you can search for all of them by clicking on the "Search assigned pages" link
Display - informs for which group of users visiting the website the widget is to be displayed. Option available after installing the users plugin
Display date range - date range within which the widget is to be aired. Option available after installing the widgetsExt plugin. Information displayed in a graphic form next to the widget's name.
Display method - determines which elements are to be displayed (page data, custom content, menu, etc.).
Options (column not labeled) - includes icons redirecting to widget edit form or deleting it
Modifying widgets on the list
You can manage widgets on the list changing their status (visible or not) or position relative to other widgets. Remember, that after changing these data, you have to save it by clicking the save button located on top and bottom of the list.
Additional options
Widget sort options - click one of the fields on top of the list: Id, Name, Position, Localization or Display option to have the list of widgets sorted by the selected field.
Widget search box - above the list there is a search box to help you find the widgets you're looking for. The search engine searches widgets by name, location or display option.
Widget edit form
Click the widget name or the icon to go to the widget edit form.
You should see a form consisting of the following fields:
Widget name. Next to this field there an option to select if the name is visible in the widget. If you uncheck it, only the name will be hidden from users visiting your website
Content
Text you can add to the widget
Location
Determines where the widget is to be displayed. Choosing the Custom option is usually used when the widget is to be placed inside a page content.
Custom - this widget is only displayed when it's added to a page content
Header - above menu - widget will be displayed in a page header above the main menu
Header - under menu and above page content - in this case it will be displayed under the main menu above the page content
Footer - under page content - widget will be displayed in the footer under page content
Footer - under footer - widget will be displayed under the page footer
Website footer - bottom bar of the website where copyright information is displayed. This location is often used to display the bottom menu with links to contact, regulations, etc.
Tech section - before the end of BODY - tech widgets displaying code of various plugins before the end of the BODY tag
Tech section - beginning of BODY - tech widgets displaying code of various plugins following the BODY tag definition
Tech section - header HEAD - tech widgets displaying code of mostly external Java Script scripts in the HEAD section
Display option
A select of elements to be displayed in a widget
Display Option available after installing the users plugin.
Determines user group that is granted access to the widget.
All - it will be displayed to all users visiting the website. Option available after installing the users plugin.
Logged in - it will be displayed only to logged in users. Option available after installing the users plugin.
Not logged in - it will be displayed only to users who are not logged in. Option available after installing the users plugin.
Position
Determines order in which widgets are displayed with respect to other widgets. The widgets are ordered from the smallest to the greatest value. Negative values are allowed.
Status
If this option is selected, widget will be visible.
Edit access Option available after installing the widgetsAccess plugin
It determines what access level is required to edit a specific widget
Typing in a date according to specified format will make the widget be displayed only from that date. Depending on settings the script allows to use two date formats.
first one is using calendar built into a browser. It is easy to use and a protects from entering the wrong date format.
second is less visually friendly, but allows for more and is well known from previous versions, the date is given together with hour and minute.
Display until
Typing in a date according to specified format will make the widget to be displayed until the given date. Depending on settings the script allows to use two date formats.
first one is using calendar built into a browser. It is easy to use and a protects from entering the wrong date format
second is less visually friendly, but allows for more and is well known from previous versions, the date is given together with hour and minute.
Display only on pages
Widgets will be displayed only on selected pages
all - the widget will be displayed on all pages
Specific pages - the widget will be displayed only on specified pages.
Display also on subpages
Widgets will be displayed also on subpages of pages selected in the field above.
This form element can be unavailable to you when a developer mode is enabled and the $config['disable_additional_params_editing'] variable is set to true. Options available here require advanced knowledge. Modifications of entered values can cause widgets to display incorrectly. Use these options carefully. In the Graphics design - advanced information » section we have described in detail how to use additional parameters.
Remember, that after making any changes in the form, you need to save it using the SAVE button at the top or bottom of the form.
List of sliders
To go to the slider list click Sliders on the top menu bar in the administration panel under the OpenSolution logo (on the left).
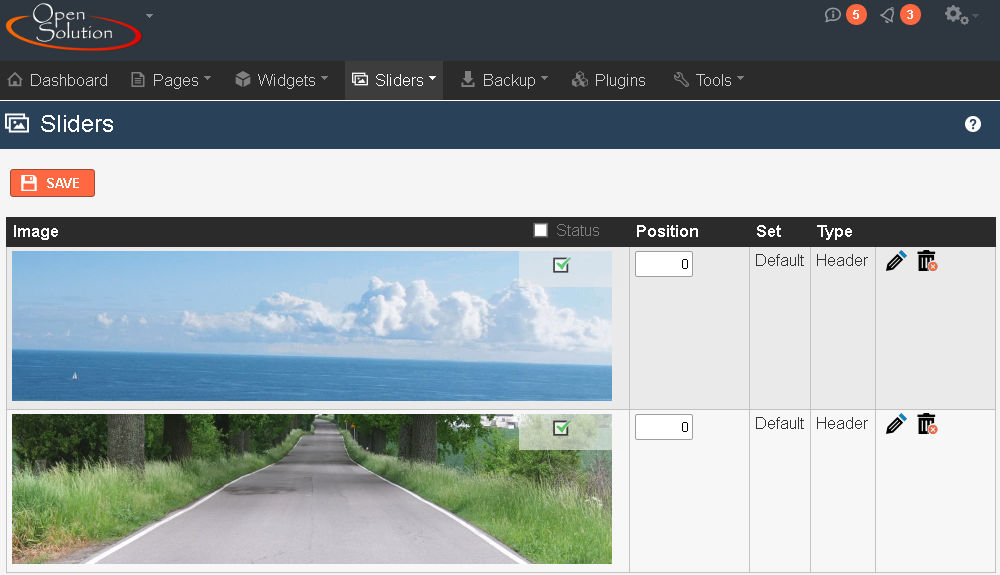
On the list of sliders you can do many operations including managing sliders. An example of the list is shown below.
Components of the list
The list is divided into columns:
Image - graphics and/or slider description
Position - determines order in which slides are displayed with respect to other slides. Slides are listed from the smallest to the greatest value. Negative values are allowed
Set - name of the set to which the slider is assigned. After installing the slidersSets plugin it can link to a set edit form.
Status - if this option is checked, the slider will be visible client-side
Type - it's the type of the slider, to which you can add an image. If more than one slide is added, they will scroll with default pause length
Options (column not labeled) - includes icons redirecting to the slide edit form or deleting it
Modifying sliders in the list
You can manage sliders in the list by changing their status (visibility) or position in relation to other sliders. Remember to save data every time you make any changes to these data by clicking the orange save button on top or bottom of the list.
Additional options
Slider search - above the list there is a search engine that will help you find sliders. The search engine searches sliders by file name, type of slider, set name or alternative description.
Slider edit form
To go to the slider edit form you need to click the slider name or the icon.
You should see a form consisting of the following fields:
Image - image that will be displayed in the slider. When adding a new slider in the version 6.5, you can select an image from your computer or from already added sliders on the server. Since version 6.5 it's also possible to change a slider image to a different one assigned to previously added sliders.
Set - enter set name in which the slider is to be in. You can also assign the slider to previously created sets.
Redirect to URL - this field may contain an address to which a user will be redirected after clicking the chosen slide. After clicking the more button, the list of pages on the website, to which a user can be redirected is displayed.
Description - text that will show on the slider
Alternate description - this field is available if an image is attached to the slider - description for the ALT attribute, very important for web search engines.
Type - slider type to which currently edited slider will be added (header or widget)
Position - determines order in which slides are displayed with respect to other slides. Slides are listed from the smallest to the greatest value. Negative values are allowed
Status - if this option is checked, the slide will be visible client-side
Options available here require more advanced knowledge. Modifying their values could cause the slide to display incorrectly. Please be careful when using these options. In the Graphics design - advanced information » section we have described in detail how to use additional parameters.
Remember, that after making any changes in the form, you need to save it using the SAVE button at the top or bottom of the form.
List of slider sets
To go to the list of slider sets point to the Sliders button on the top menu bar in the admin panel under the OpenSolution logo (on the left), and then click on the Slider sets link.
The list could look as follows:
Components of the list
Id - slider set id
Set - slider set name
Type (used on pages) - it is the slider set type (images assigned to it, to be precise). Default slider types are: "Widgets" and "Header". Hovering over the digit will display a list of subpages to which the widget is assigned. When there are more subpages, you can search for all of them by clicking on the "Search assigned pages" link.
Sliders - informs how many slides (single images) the slider contains
Status - is the set active
Options (column not labeled) - contains icons responsible for going to set edit form or deleting it
Additional options
Sort sets - click on one of the fields at the top of the list: Id, Set or Type, to see the list sorted by the chosen field.
Search sets - above the list there is a search box that will help you find a specific set
None and The same as for the parent page -these are the options set in the "Slider" field when editing a subpage. With this information you will learn and also search for all pages and subpages that have this option selected.
Editing slider sets
To go to a slider set edit form, click the set's name or the icon.
You should see the form containing the following fields:
Type (used on pages) - it is a slider set type (images assigned to it, to be precise). Default slider types are: "Widgets" and "Header". Numbers displayed in a circle inform about the number of pages in which a given set is shown. They also allow to see these pages (when you point to them).
Options available here require advanced knowledge. Modifications of entered values can cause the sliders to display incorrectly in its menu. Use these options cautiously. In the Graphics design - advanced information » section we have described in detail how to use additional parameters.
This tab has a Search assigned pages link that will allow you to find all pages assigned to this set of sliders. The tab and link will only appear for the edited set that has the "Type" field set to Header.
Remember, that after making any changes in the form, you need to save it using the SAVE button at the top or bottom of the form.
List of backups
To go to the list of backups click Backup on the top menu bar in the administration panel under the OpenSolution logo (on the left).
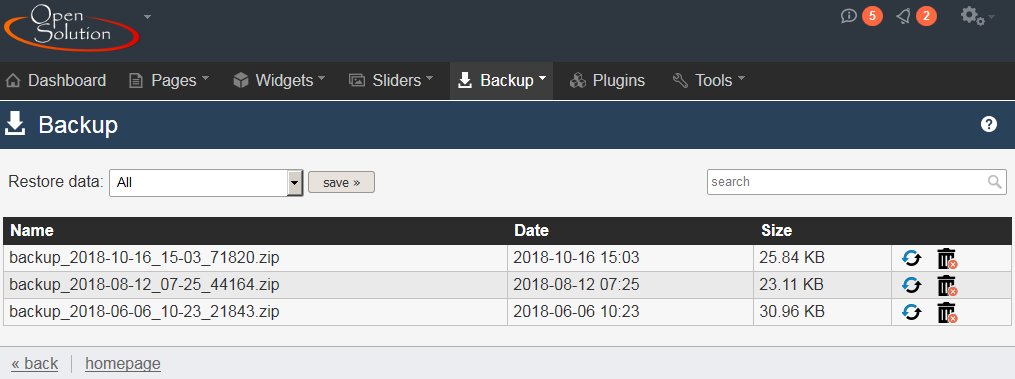
On the list of backups you can restore and delete specific backups. An example of this list might look like this:
Components of the list
The list is divided into columns:
Name - backup file name
Date - date the backup was created
Size - size of the backup
Options (column not labeled) - includes icons responsible for restoring a backup or deleting it
Additional options
Backup copy search box - above the list there is a search box that will help you find the backup copy you're looking for
Restore data - over the list there is another one, from that list you can choose which data will be restored, when you click the icon.
List of plugins
To go to the list of plugins click Plugins on the top menu bar in the administration panel under the OpenSolution logo (on the left).
On the list you can check plugins you want to install and see a setup guide for a given plugin. If the plugin's text is gray, it means that the plugin is already installed. The list could look like this:
Components of the list
The list is divided into columns:
Install - plugins for which this field is checked will be installed after clicking the install button
Screenshot - image visually representing the plugin
Name - name of the plugin
Description - short description of the plugin's functionality
Options (column not labeled) - includes an icon responsible for redirecting to the plugin's setup guide
Installing a plugin
To install plugins, on the left side of the table put a check mark next to the plugins you want to install. Then click the install button, you will see a window with an plugin installation progress bar.
Additional options
Plugin search box - above the list there is a search box to help you find the plugin you're looking for
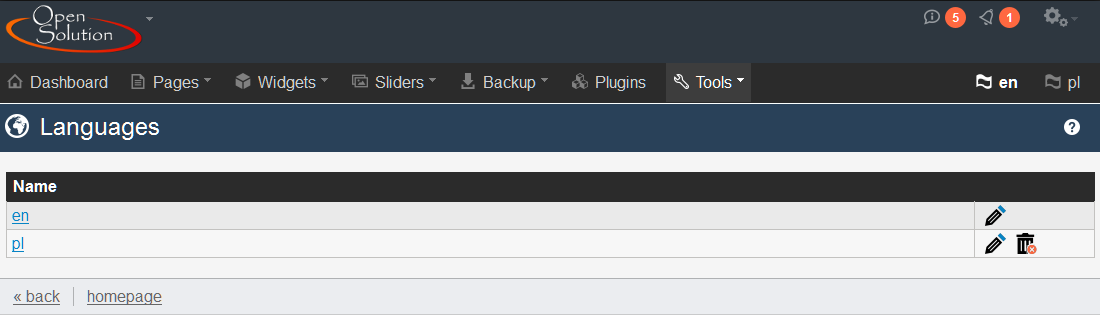
List of languages
To get to the list of languages point to the Tools button on the top menu bar in the administration panel under the OpenSolution logo (on the left), then click the languages link.
From the list of languages you can go to language edit form to make changes in a translation. The list looks like in the example below:
Description of the list
The list is divided into two columns:
Name - language's ISO code of
Options (column not labeled) - includes an icon responsible for redirecting to the language edit form
Language edit form
To go to a language edit form, click the language name or the icon.
This tab contains translations used as email templates sent by the system, for example notifications about a new comment added on a website. You can use additional options (variables) here. For example, using [PAGE_NAME] in the email content, will insert information about name of the website on which the comment was placed.
Additional information
When there are more than one language in the script, additional translations from the main language set in script's configuration will be displayed when one of the languages is edited.
Remember, that after making any changes in the form, you need to save it using the SAVE button at the top or bottom of the form.
New language
To add a new language point to the Tools tab and click the new language link.
You should see a form containing the following fields:
Components of the form
Language - language ISO code
Upload language file - choose the file with translation. You can download the file from the translations page
Create a new language version using - from the list choose a language, from which translations will be copied if one is missing in the new language file
Clone data from basic language - check this option if you want to copy all data from the basic language database (pages, widgets, sliders). More »If your website has hundreds of pages or files, contact your webmaster to do this for you. You should do the cloning on a local server, but first in the PHP configuration file (php.ini) set the max_execution_time option to, for example, 180. If you encounter more problems moving the data, restore a backup and increase the execution time limit.
Remember, that after making any changes in the form, you need to save it using the SAVE button at the top or bottom of the form.
After adding a new language, click the link representing its name on the right side of the top menu in the admin panel. Then go to settings » to set the new start page, search results page, etc. for the new language.
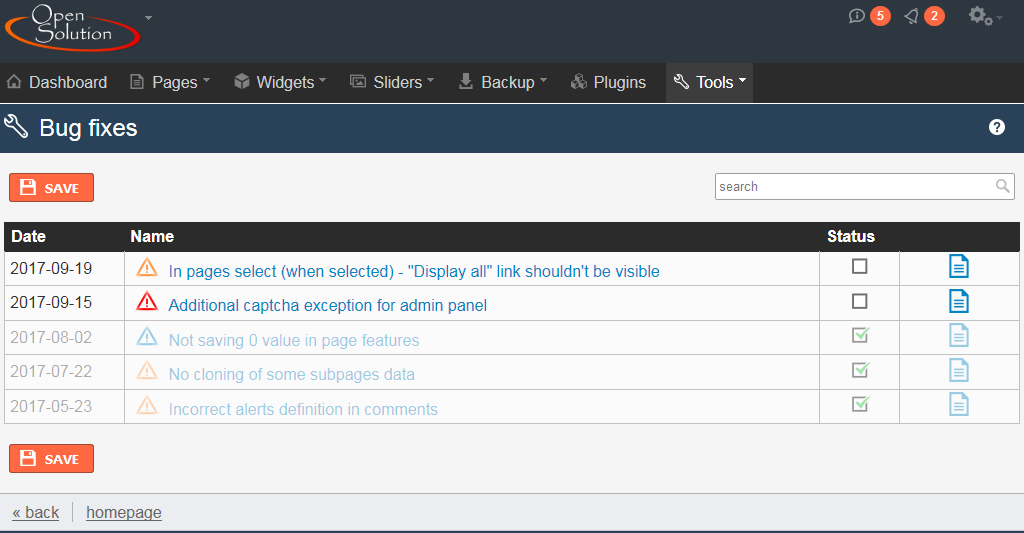
Bug fixes list
To go to the list of bug fixes, hover over the icon above the top menu and then click the Bug fixes link.
From the list of bug fixes you can learn more about fixes that refer to your script. The list looks similar to the one below:
Components of the list
The list is split into three columns:
Date - of plugin's release
Name - short description of a bug
Status - bug status (corrected or not). You have to mark this field yourself if you know, that you've implemented the bug-fix and the system is not able to verify it automatically. After marking this field, remember to click "SAVE".
Options (column not labeled) - includes an icon responsible for redirecting to the specific bug page
Additional information
Each exclamation point icon in description denotes priority level stating how important implement a given fix is:
- low priority bug fix
- medium priority bug fix
- high priority bug fix
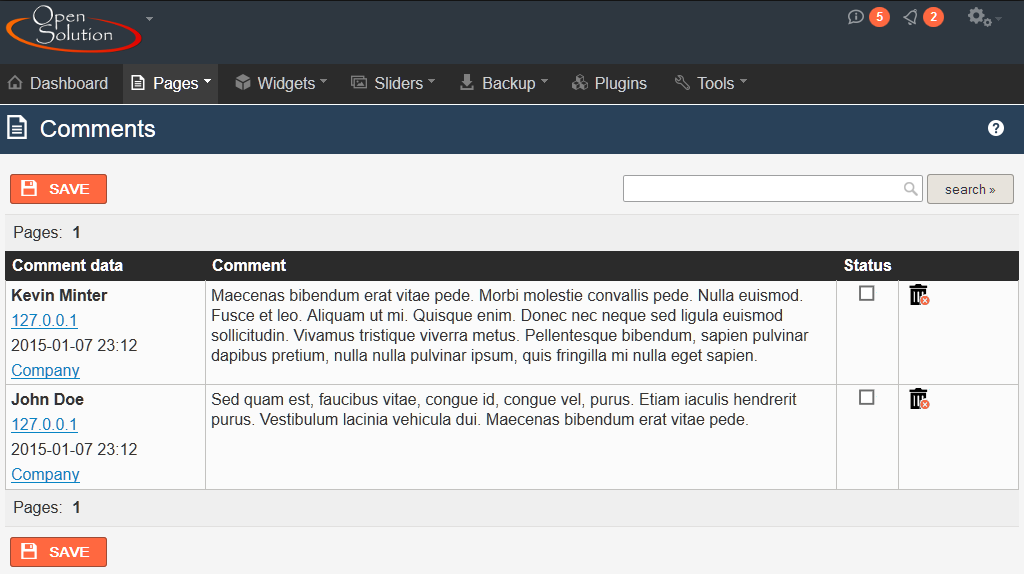
Comments
To go to the list of comments point to the Pages button on the bar in the top menu in the administration panel below OpenSolution logo (on the left), and then click the Comments link.
Note! This functionality is available only with the comments plugin, which requires installation. If you don't have this option on the menu, it probably means that the plugin was not installed.
The list of comments contains information about comments on your website. An example of such list looks like this:
Components of the list
The list is divided into three columns:
Data - information about the comment's author (first and last name, ip, date the comment was added, page on which the comment was added)
Comment - content of a comment
Status - status of a comment
Widget - placing a comment in the pool of comments randomly displayed in a widget Option available after installing the commentsExt plugin.
Options (columns not labeled) - includes the icon responsible for deleting selected comments
Modifying comments from a list
You can manage comments from the list by changing their status (visibility). Remember to save the data after making changes, by clicking on the orange save button on top or bottom of the list.
Additional options
Search comments - above the list there is a search box allowing to filter comments by a phrase, as well as sbupages to which those comments were added.
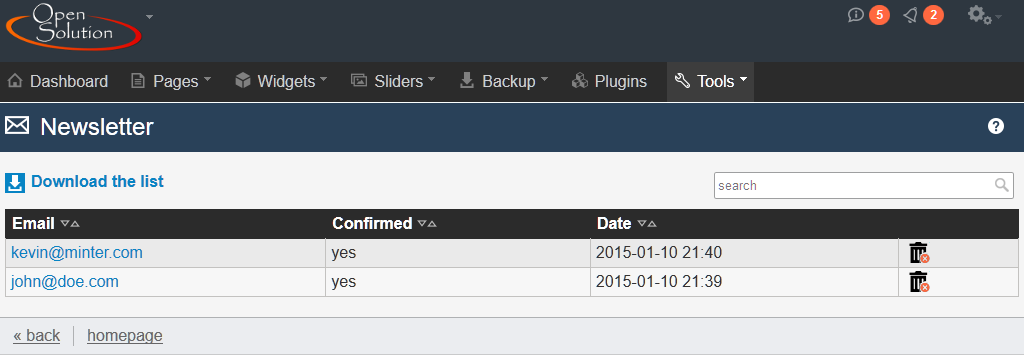
Newsletter
To get to the list of subscribers' emails point to the Tools button on the top menu bar in the administration panel under the OpenSolution logo (on the left), and then click the Subscription link.
Note! This functionality is available only with the newsletterLiteExt plugin, for which installation is required. If you don't have this option on the menu, it probably means that the plugin was not installed.
The subscriptions list contains more information about email addresses added to your subscription list. An example of subscription list is shown below:
Components of the list
The list is divided into three columns:
Email - subscription e-mail address
Approved - shows whether the email was approved by an administrator
Date - date the email was added to the subscription list
Options (column not labeled) - includes the icon responsible for deleting selected emails from the list
Additional information
E-mail addresses can be exported to a file by clicking the Download the list link. The addresses can be then imported to a website which provides services of mass email sending, for example mailchimp.com.
List of redirections
To go to the redirections list point to the Tools button on the top menu bar in the administration panel under the OpenSolution logo (on the left), and then click the List of redirections link.
Note! This functionality is available only with the seoOptions plugin, for which installation is required. If you don't have this option on the menu, it probably means that the plugin is not installed.
The redirections list contains more information about redirections used on your website. An example of this list is shown below:
Components of the list
The list is divided into three columns:
Redirect from - address from which a user is redirected
Redirect to - address to which a user is redirected. It's possible to enter external address, for example: https://opensolution.org
Exact - selecting this options that the address from which a user is redirected can not contain any additional parameters, otherwise the redirection will not occur
Status - redirection status
Polls
To go to the list of polls point to the Tools button on the top menu bar in the admin panel under the OpenSolution logo (on the left) and then click the Polls link.
Note! This functionality is available only with the polls plugin, for which installation is required. If you don't have this option on the menu, it probably means that the plugin is not installed.
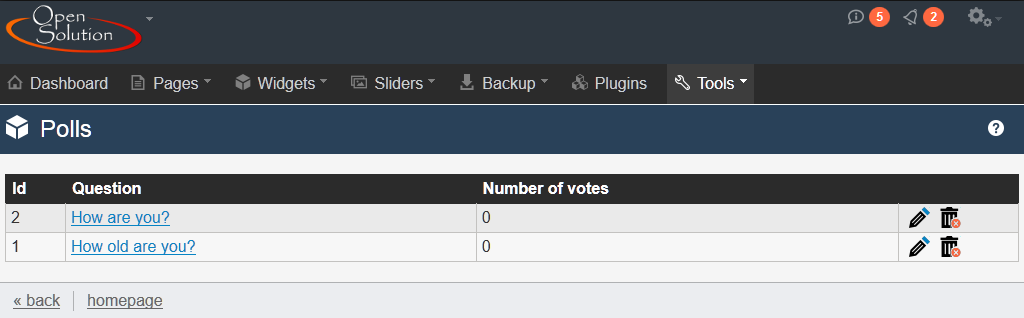
From the list of polls you can learn more about polls on your website. A list of polls can look like the following one:
Components of the list
The list is divided into columns:
Id - poll's id
Question - poll's question
Number of votes - number of all votes submitted in a given poll
Options (columns not labeled) - includes the icon responsible for deleting selected emails from the list
include the icon redirecting to a poll's edit form or the delete icon
New poll
To add a new poll point to the Tools tab and then click the New poll link.
You should see a form comprised of the following fields:
Components of the form
Question - question directed to website's visitors
Answer - answer the website's visitors will be able to choose
Position - determines order in which answers are displayed with respect to other answers. The answers are ordered from the smallest to the greatest value. Negative values are allowed
Votes - number of votes submitted for specific answers. The values are displayed when a poll is edited.
All votes - number of all votes submitted. The value is displayed when a poll is edited.
Remember, that after making any changes in the form, you need to save it using the SAVE button at the top or bottom of the form.
File manager
To go to the list of files on the server, point to the Tools button on the top menu bar in the admin panel under the OpenSolution logo (on the left), then click the Files link.
Note! This functionality is available only with the filesManagerExt plugin, for which installation is required. If you don't have this option on the menu, it probably means that the plugin is not installed.
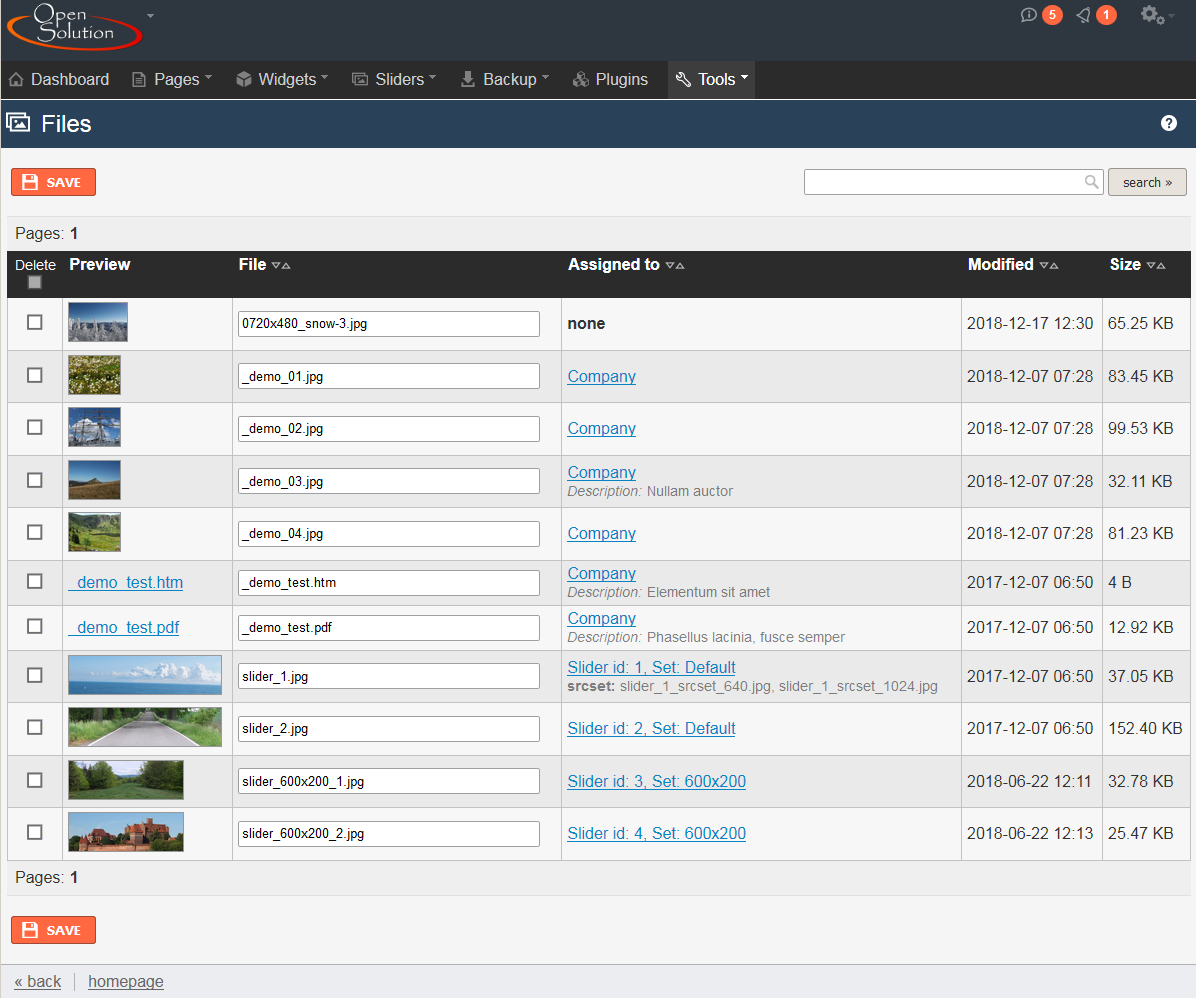
From the list of files you can learn more about files on your server. A list of files can look like this:
Components of the list are the following
The list is divided into columns:
Delete - checked files will be deleted after clicking the Save button
Preview - image thumbnail for images on specific pages
File - file name
Assigned to - informs to which page or slider a given file is assigned. Click the page or slider name to go to its edit form. Below there is an image description within a page. In case of sliders, additional information about files for responsive versions (srcset) generated for a given slider can be displayed.
Modified - informs when a given file was last modified
Size - file size
Additional options:
Sorting files - click one of the fields on the top of the list: File, Assigned to, Modified or Size to sort the list by the chosen field. Sorting by "Assigned to" is not all that typical, because it not mostly used to sort by the assigned name. It allows to display the files which are not assigned to any page or slider first, and those which are, are sorted by file name.
Delete files - tick files on the list you want to delete, then click the save button to confirm.
Change file names - in the File columns change the existing name to another one.
Remember, that after making any changes in the form, you need to save it using the SAVE button at the top or bottom of the form.
Tags
To go to the list of tags point to the Tools button on the top menu bar in the admin panel, under the OpenSolution logo (on the left), then click the Tags link.
Note! This functionality is available only with the tags plugin, for which installation is required. If you don't have this option on the menu, it probably means that the plugin is not installed.
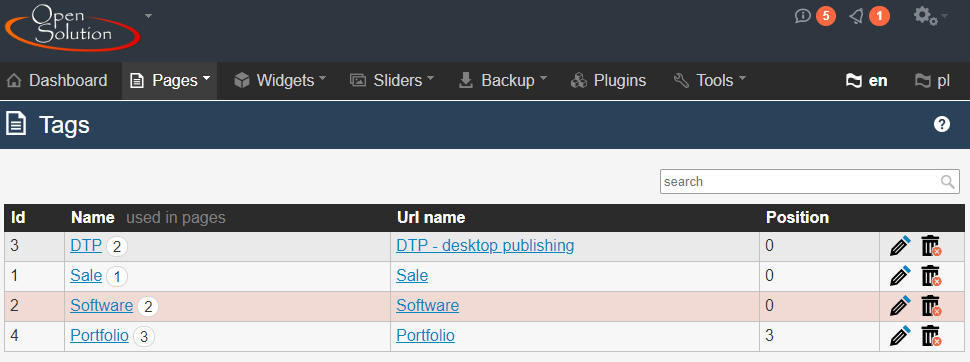
From the list of tags you can learn more about tags on your website. A list of tags can look like the following one:
Components of the list are as follows:
The list is divided into the following columns:
Id - tag's id
Name - tag name
used in pages - the number of pages using this tag. Hovering over the digit will display a list of subpages that use the selected tag. When there are more subpages, you can search for all of them by clicking on the "Search assigned pages" link
URL name - address which is generated and then displayed after going to pages which use a given tag
Position - determines order in which tags are displayed with respect to other tags. The tags are ordered from the smallest to the greatest value. Negative values are allowed
Options (column not labeled) - include icons responsible for editing or removing tags
Additional options
Tag search - above the list there is a search field to filter tags by the entered phrase.
New tag
To add a new tag to a page, point to the Pages tab and then click the New tag link.
You should see a form with the following fields:
Components of the form are:
Name - tag name
URL name - address shown after going to pages to which the tag was assigned
Page title - name that will be shown on the browser's bar, as well as a title under which it will show in Google search
Meta description - the field contains a short description of a website visible and used by search engines
Position - determines order in which tags are displayed with respect to other tags. The tags are ordered from the smallest to the greatest value. Negative values are allowed
Clicking on the Search assigned pages link available when editing a tag, redirects to the list of pages assigned to the edited tag.
Remember, that after making any changes in the form, you need to save it using the SAVE button at the top or bottom of the form.
Administrators
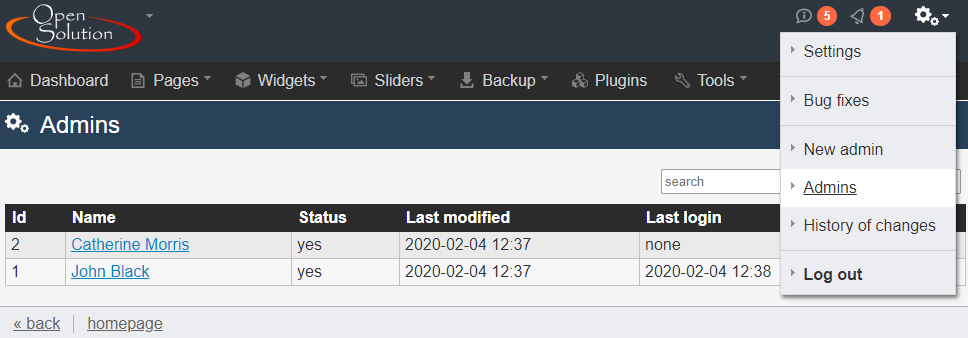
To go to the list of administrators, hover over the icon above the top menu and then click the Admins link.
Note! This functionality is available only with the admins plugin, which requires installation. If you don't have this option on the menu, it probably means that the plugin was not installed.
The list of administrators contains more information about administrators on your website. An example of such list looks like this:
Components of the form are
The list is divided into columns:
Id - administrator's id
Name - administrator's first and last name
Status - information about whether a given administrator will have the ability to log in to the administration panel
Last modified - date and time of last modification made by the administrator
Last login - date and time of last administrator's login
Options (column not labeled) - contain icons responsible for editing or deleting administrators
New administrator
To add a new administrator to the page, hover over the icon and then click the New admin button.
This tab allows to set right for a new admin for specific sections in the admin panel. For example, selecting the "Sliders" field means, that the admin will be able to manage sliders. Marking the "Backup" field means, that the admin will be able to view and restore backups, etc.
Some in sections permission rights can be assigned in a more complex manner. You can give an admin rights to edit, add or delete separately. This means that an admin can either have full rights to manage widgets, or just to edit them.
After installing some plugins, additional sections will appear, such as: comments, newsletter, users etc. Most of them has basic access rights set, that is only for the whole section, without the above division.
Remember, that after making any changes in the form, you need to save the data using the SAVE button on top and bottom of the form.
Page statistics
To go to the list of page statistics click the Tools button on the top menu bar in the administrations panel under the OpenSolution logo (on the left), and then click the Page statistics link.
Note! This functionality is available only with the stats plugin, for which installation is required. If you don't have this option on the menu, it probably means that the plugin is not installed.
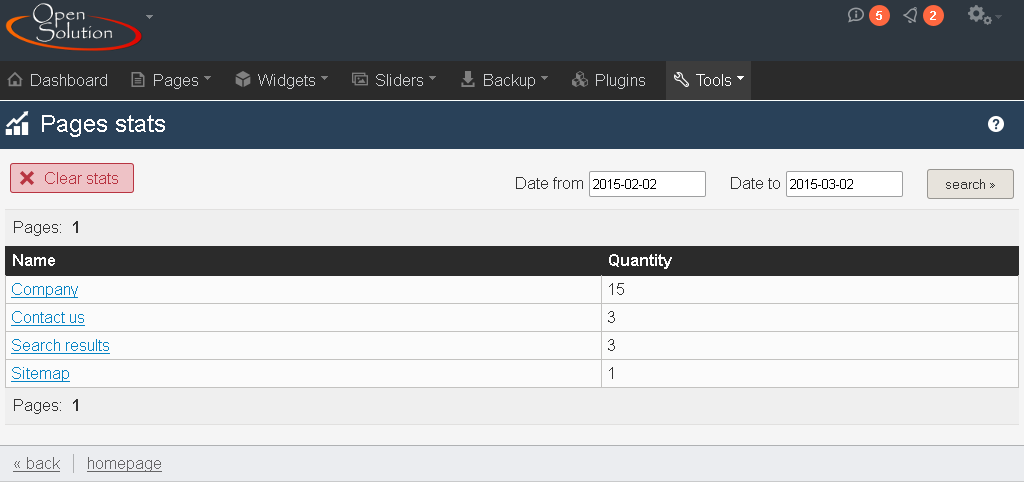
The list of page statistics contains more information about viewing of pages on your website. An example of such list looks like this:
Components of the form are
The list is divided into columns:
Name - name of viewed page (click the name to go to detailed statistics of the page)
Number - number of views of specific page
Additional options
Clear statistics - possibility to clear statistics. In order to improve performance we recommend clearing statistics from time to time.
Date from - date from which statistics of pages viewed on the website are counted.
Date to - date to which statistics of pages viewed on the website are counted.
Search - searches statistics within specified date range.
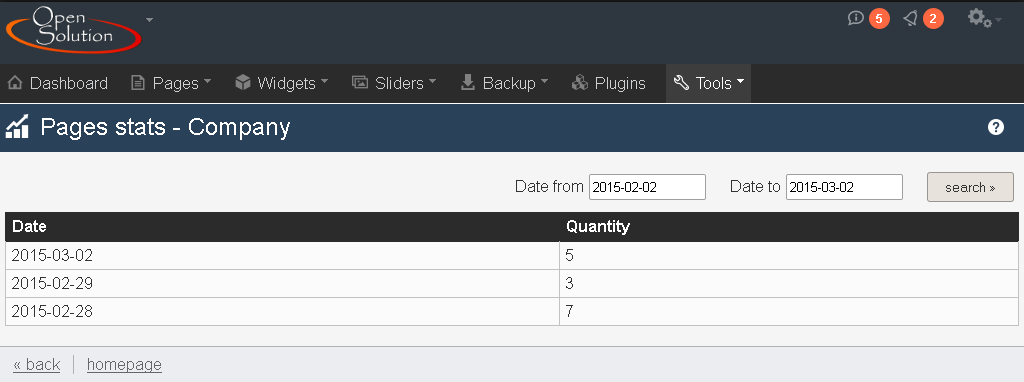
Click the page name to go to statistics relating to the specific page. An example of this list looks like this:
Components of the form are
The list is divided into columns:
Date - date a page was displayed
Number - number of views of given page on the specific day
Additional options
Date from - date from which statistics of pages viewed on the website are counted.
Date to - date to which statistics of pages viewed on the website are counted.
Search - searches statistics within specified date range.
Searched phrases
To go to the list of searched phrases click the Tools button on the top menu bar in the administrations panel under the OpenSolution logo (on the left), and then click the Searched phrases link.
Note! This functionality is available only with the stats plugin, for which installation is required. If you don't have this option on the menu, it probably means that the plugin is not installed.
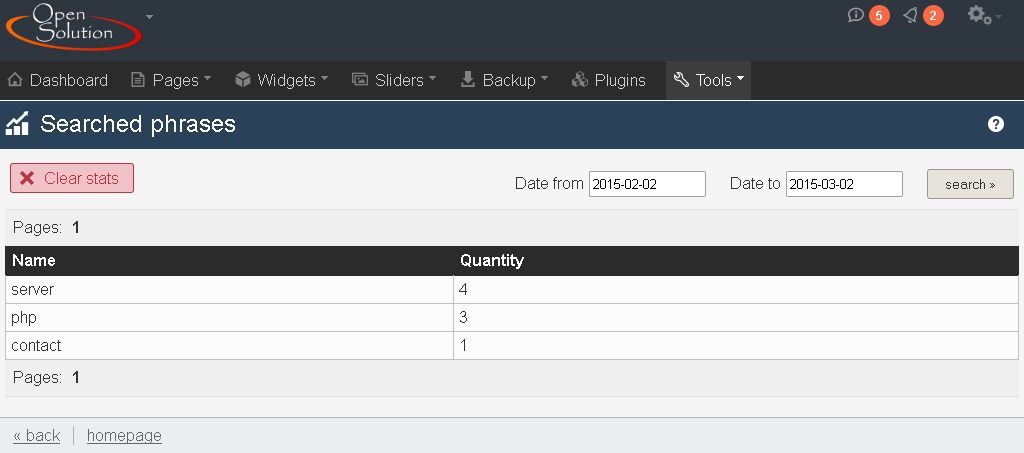
The list of searched phrases contains more information about phrases that have been searched on your website. An example of such list looks like this:
Components of the form are
The list is divided into columns:
Name - name of phrase searched on the website
Number - number of times the phrase was searched
Additional options
Clear statistics - possibility to clear statistics. In order to improve performance we recommend clearing statistics from time to time.
Date from - date from which statistics of searched phrase on the website are counted.
Date to - date to which statistics of searched phrase on the website are counted.
Search - searches statistics within specified date range.
File statistics
To go to the list of file download statistics click the Tools button on the top menu bar in the administration panel under the OpenSolution logo (on the left), and then click the File statistics link.
Note! This functionality is available only with the stats plugin, for which installation is required. If you don't have this option on the menu, it probably means that the plugin is not installed.
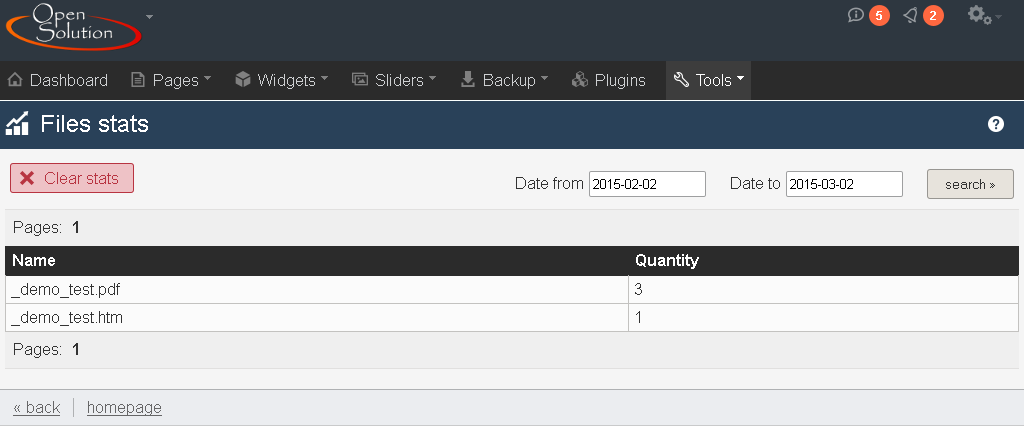
The list of file statistics contains more information about statistics of files downloaded from your website. An example of such list looks like this:
Components of the form are
The list is divided into columns:
Name - name of file downloaded from the website
Number - number of downloads of the file
Additional options
Clear statistics - possibility to clear statistics. In order to improve performance we recommend clearing statistics from time to time.
Date from - date from which statistics of file downloads on the website are counted.
Date to - date to which statistics of file downloads on the website are counted.
Search - searches statistics within specified date range.
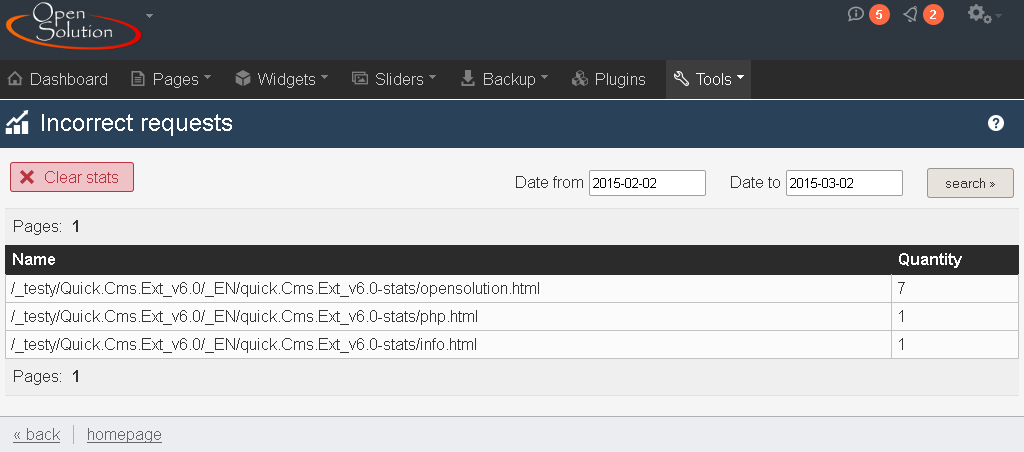
Incorrect calls
To go to the list of calls of incorrect addresses click the Tools button on the top menu bar in the administration panel under the OpenSolution logo (on the left), and then click the Incorrect calls link.
Note! This functionality is available only with the stats plugin, for which installation is required. If you don't have this option on the menu, it probably means that the plugin is not installed.
The list of incorrect calls contains more information about incorrect addresses called from your website. An example of such list looks like this:
Components of the form are
The list is divided into columns:
Name - name of the incorrectly called link
Number - number of calls of the incorrect link
Additional options
Clear statistics - possibility to clear statistics. In order to improve performance we recommend clearing statistics from time to time.
Date from - date from which statistics of incorrect link calls on the website are counted.
Date to - date to which statistics of incorrect link calls on the website are counted.
Search - searches statistics within specified date range.
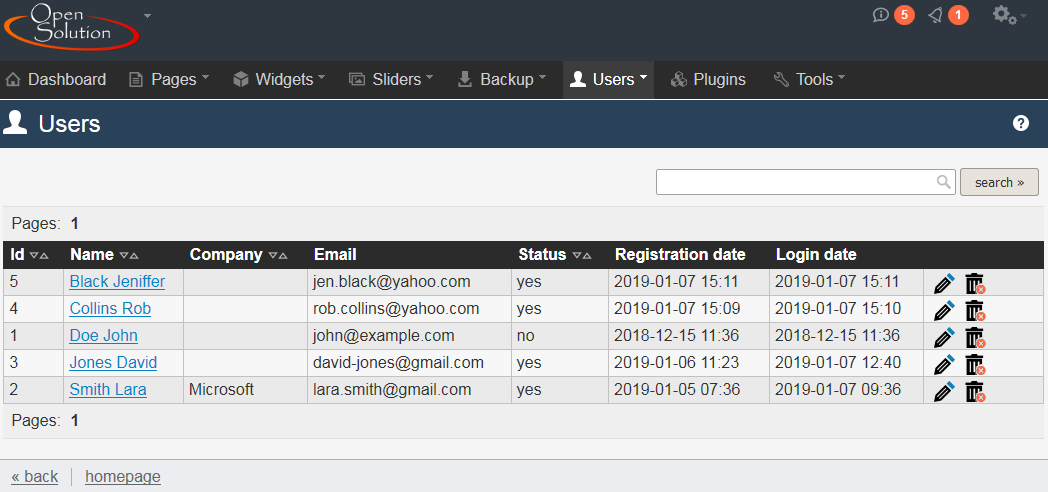
Users
To go to the list of users click the Users button on the top menu bar in the administration panel under the OpenSolution logo (on the left).
Note! This functionality is available only with the users plugin, which requires installation. If you don't have this option on the menu, it probably means that the plugin was not installed.
The list of users contains more information about users registered on your website. An example of such list looks like this:
Components of the form are
The list is divided into columns:
Id - user's ID
Name - user's last and first name. If the "ordering" plugin is installed, then number of placed orders is shown next to the user name.
Company - user's company name
Email - user's email address he will use to log in
Status - informs whether the user is allowed to log in
Registration date - date and time the user registered
Login date - date and time of the last successful user login
Options (column not labeled) - contains icons responsible for editing users or deleting them
Additional information
Sort users - click one of the fields on top of the list: Id, Name, Company or Status to see the list sorted by the chosen field.
Search users - above the list there is a search box you can use to find the user you need.
New user
To add a new user to a website point to the Users tab, and then click the New user button.
You should see the form containing the following fields:
In this field an administrator can save a comment regarding the user. This field is only visible to the administrator.
Remember, that after making any changes in the form, you need to save it using the SAVE button at the top or bottom of the form.
Additional save options:
save and go to the list - this save option will save the changes made to the edited user and redirect to the list of users.
save and add another - this save option will save the changes made to the edited user and redirect to an empty new user form.
User groups
To go to the list of user groups point to the Users button on the top menu bar in the administration panel under the OpenSolution logo (on the left), and then click the Groups link.
Note! This functionality is available with the users plugin, which must be installed first. If you don't see this position in the menu, the plugin is probably not installed.
The list of groups provides more information about user groups on your website. An example of such list looks like this:
Components of the form are
The list is divided into columns:
Id - group's id
Name - user group name
Option (column not labeled) - include icons you can use to edit a group or delete it
Additional information
Search for groups - above the list there is a search box that will help you find the user group you're looking for.
New user group
To add a new user group to a page point to the Users tab and then click the New group button.
You should see the form containing the following fields:
The form's components
Name - user group's name
Remember, that after making any changes in the form, you need to save it using the SAVE button at the top or bottom of the form.
Additional save options:
save and go to the list - this save option will save the changes you made in the user group you're editing and redirect you to the list of groups.
save and add another - this save option will save the changes you made in the user group you're editing and redirect you to an empty form so you can add a new group.
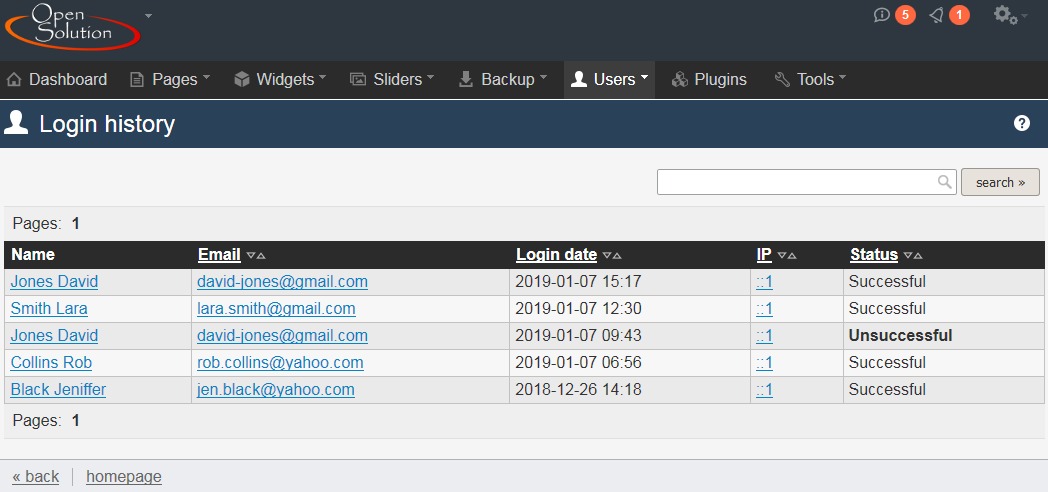
Login history
To go to user login history point to the Users tab and then click on the Login history button.
Notice! This functionality is available with the users plugin, which must be installed. If you don't see this menu item, probably this plugin hasn't been installed.
The displayed list contains the history login attempts in to the website. Bot successful and unsuccessful user loggins are saved, as well as attempts to login to a non-existing accounts. The list could look like the following:
The list's layout
The list is divided into columns:
Name - user's last and first name. "none" means that a user tried to log in into an account that doesn't exist on the website.
Email - email address a users used to try to log in
Login date - date and time of specific login attempt
IP - IP address from which the login attempt was made
Status - informs whether the login was successful
Additional information
Sorting login history - click on one of the fields on top of the list: Email, Login, Date, IP, Status, and the list will be sorted by the chosen field.
Search - above the list there is a search box, which will help you find events that interest you easier.
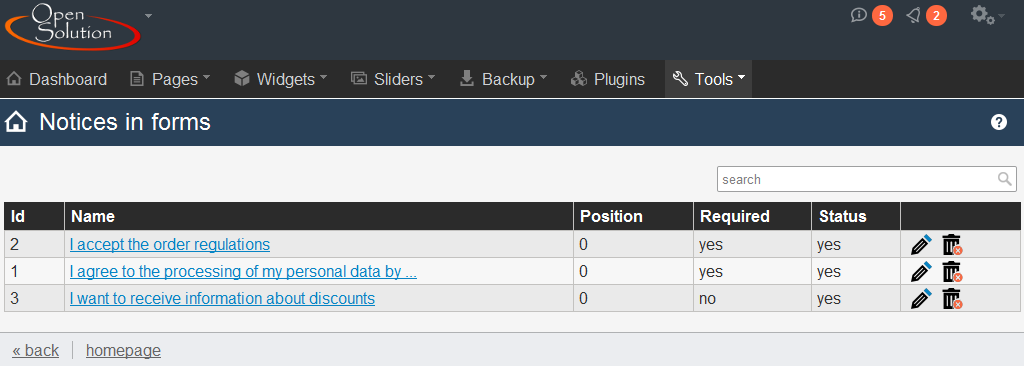
Notices in forms
To go to the list of notices, point to the Tools button on the main menu bar in the administration panel under the OpenSolution logo (on the left), then click the Notices in forms link.
Notice! This functionality is available with the noticesAccepts plugin, which needs to be installed. If you don't have this position in the menu, the plugin probably hasn't been installed.
From this list you can learn more about notices attached to forms on your website. The list could look as follows:
The components of the list are
The list is split into two columns:
Id - notice's id
Name - notice's name/content
Position - determines order in which a notice is displayed with respect to the other ones. The values are sorted in ascending order. Negative values are allowed
Required - informs whether accepting a given notice is required to send the form to which it's attached
Status - determines whether the notice is visible for clients
Options (column not labeled) - includes icons redirecting to notice edit form or deleting it
Additional options
Notice search box - above the list there is a search box, that will make it easier to find a notice you're looking for if there are a lot of them.
New notice in forms
To add a new notice to a form, point to the Tools tab, and then click the New notice button.
You should see a form containing the following fields:
The components of the form are
Name - notice's name/content
Position - determines order in which a notice is displayed with respect to the other ones. The values are sorted in ascending order. Negative values are allowed
Status - if the option is checked, the notice will be visible for customers
Required - if the option is checked, accepting this notice is required to send the form to which it's attached
Forms - assigning a given notice to a selected form (or forms) on the website
After making changes to a form's data, remember to save the data using the SAVE button, on top or bottom of the form.
Additional saving options:
save and go to the list - this save option will save the changes made to the edited notice and redirect to the list of notices.
save and add another - this save option will save the changes made to the edited notice and redirect to an empty new notice form.
History of changes
To go to the history of changes, hover over the icon above the top menu and then click the History of changes link.
Note! This functionality is available with the pagesLogs plugin, which requires installation. If you don't see this position in your menu, the plugin was probably not installed.
You will see the history of modifications of subpages made by each of the admins.
List components
The list is divided into columns:
Name - name of modified or deleted page
Admin's data - admin's name. Name of the main administrator and web developer can be set in the language edit form » in Developer_admin and Main_admin fields.
Date - date of performed action
Options (column not labeled) - contains the log delete icon
Additional options
Filtering results - above the list there are options: Date from, Date to, Admins and Pages. They allow to browse through the history of changes by various parameters.